Creating and running your first package
The automator is an iPaaS that allows you to build powerful automation workflows for integrating applications, both cloud-based and on-premises.
The basic building block of an integration is a package. A package is a piece of code that can be executed in response to a specific event, such as a webhook or a received email.
In this tutorial, we'll create a simple package that will illustrate the basics of creating and running an integration.
First, log in to the automator. You should automatically end up on the Packages tab of your profile. If not, click on the Packages tab in the top navigation bar.
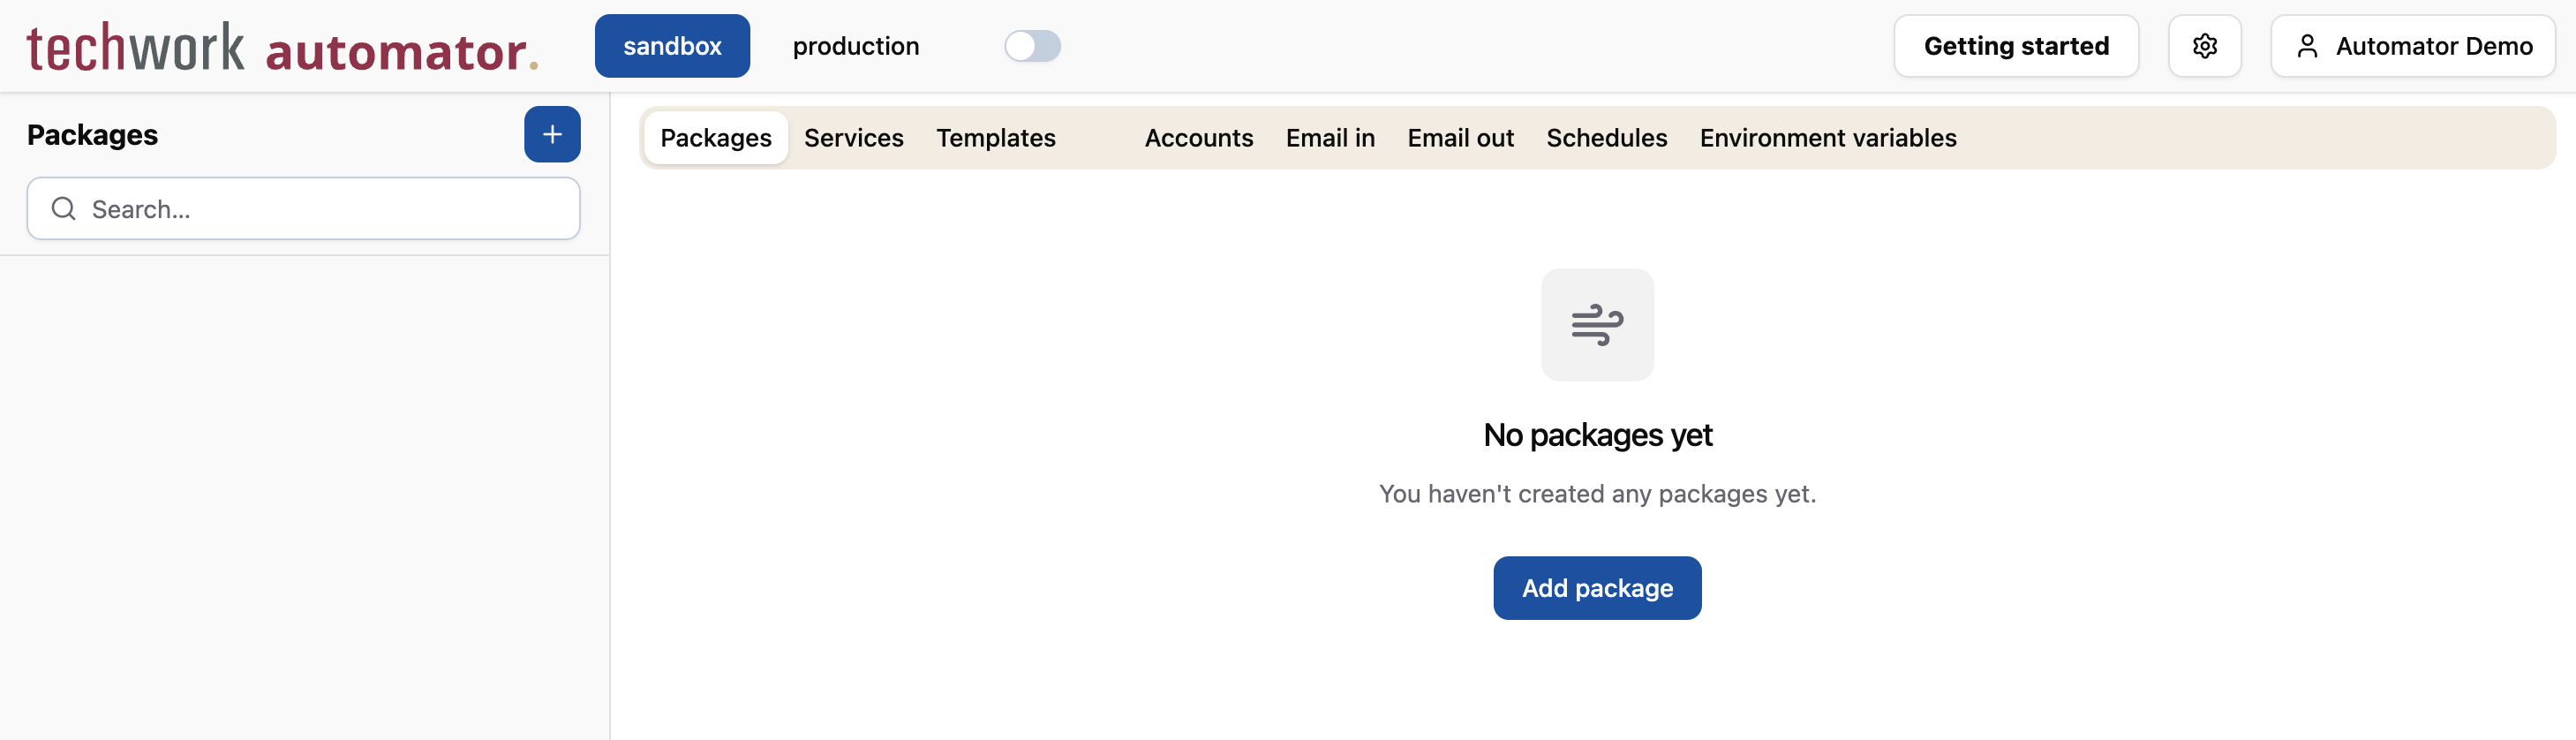
Click on the + button at the top of the sidebar to create a new package. When prompted for a name, enter
My First Package and press Add (or use the enter key on your keyboard).
You end up on the Script tab of the package, with the cursor placed right in front of the phrase "Package Main Objective" in the code editor, inviting you to describe what your package does. Go ahead and replace this with something more descriptive, such as "Demo package created in the Getting Started guide".
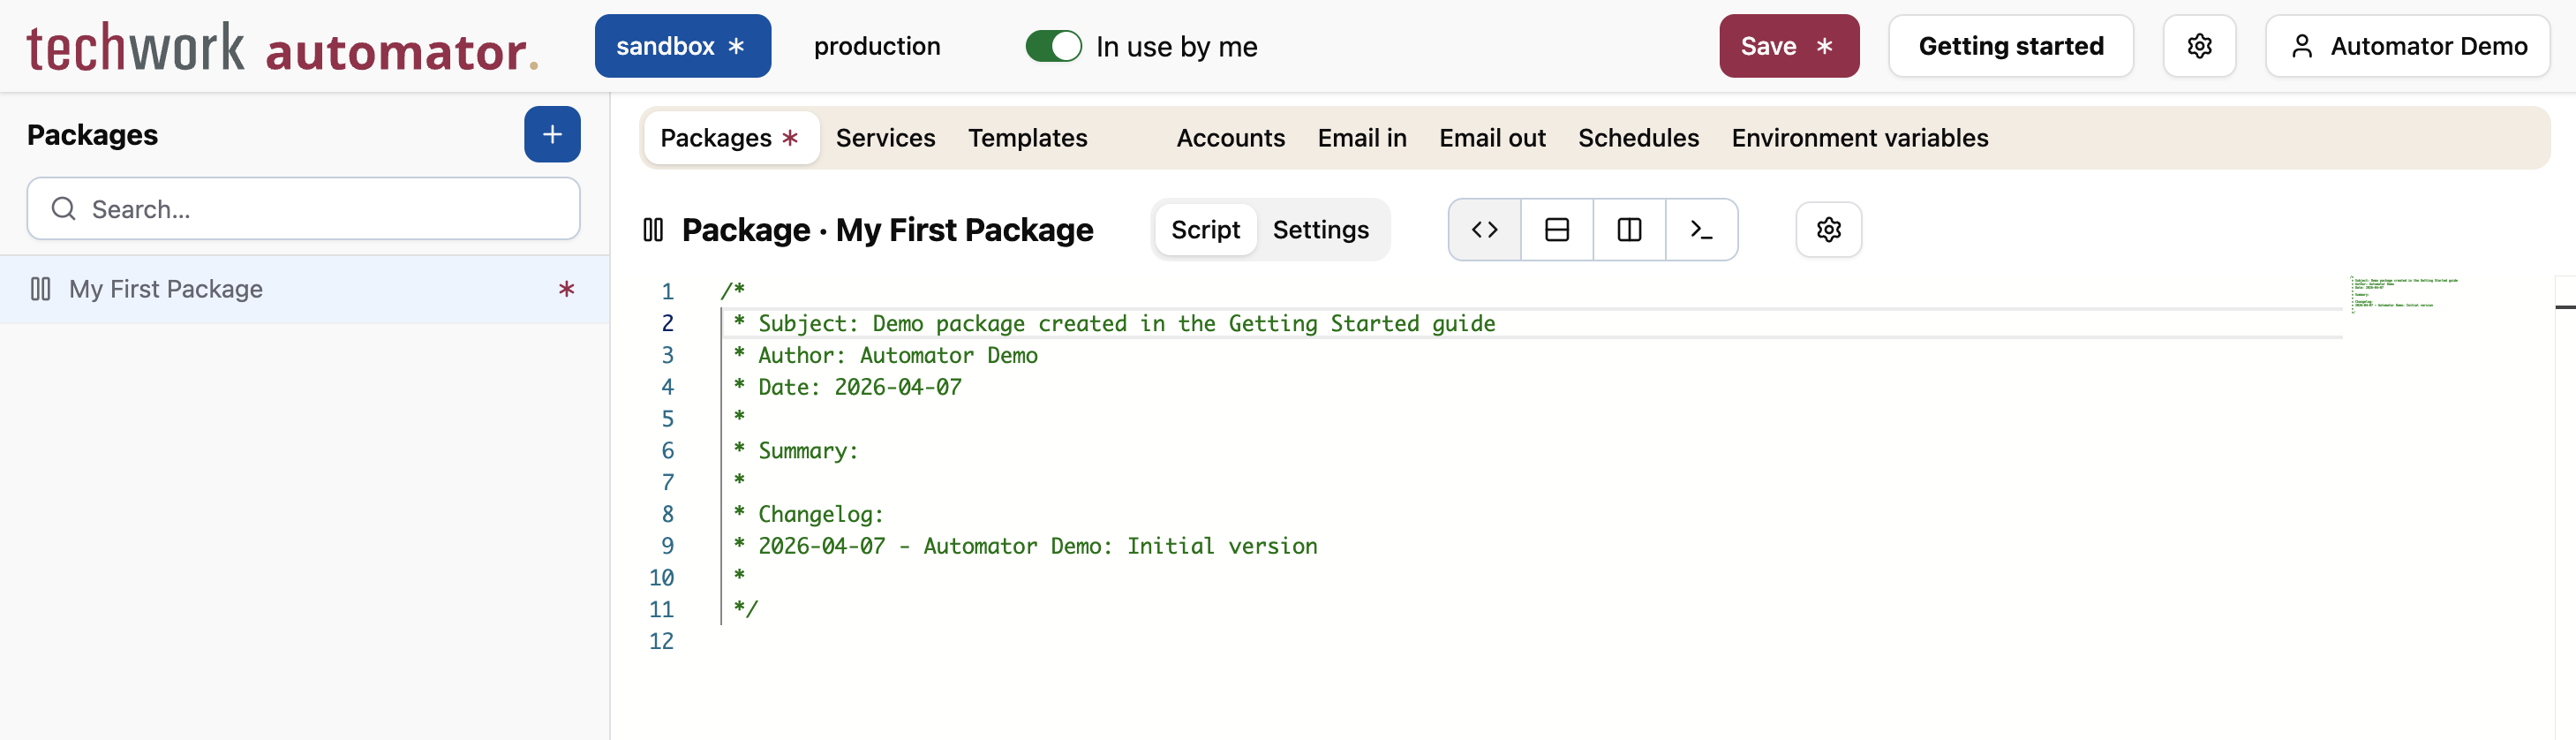
Whenever you create a new package, the code editor is pre-populated with a header comment that you can use to document your package and indicate important changes over time. You're free to edit this comment as you see fit (or even delete it), but it's a good idea to keep it up-to-date. As your profile grows and more and more packages are created, the header comments will provide useful context for future maintenance.
Notice that there is a star icon in the sidebar next to the package that you just created. This indicates that the package has unsaved changes. You can see that the same star appears in other places: in the "Packages" tab, in the button indicating the currently active environment in the header, and in the "Save" button. The automator allows you to bundle multiple changes to your profile into a single save operation, which can be very useful if, for example, a change requires you to make changes to multiple records simultaneously. The star icon helps you to keep track of where you are in the process of making changes.
Now, let's make the package do something useful - or at least produce some output when it is executed.
Move the cursor to the end of the code editor, below the header comment.
Type the following code:
log("Hello, world!");
As you can guess, this code will log a simple greeting message. It uses the automator function log to do this.
Packages are written in AutomatorScript, which is a programming language that is compatible with JavaScript and supports almost all of its syntax and quite a few of JavaScript's built-in objects, such as arrays and strings. In addition, we have added many custom functions to the language that make it easier to build automations.
In this tutorial and the rest of the documentation, we will explain automator-specific functionality in detail, but we do assume that you are somewhat familiar with programming and JavaScript. If you're new to either, we recommend searching the web for a good tutorial, such as The Modern JavaScript Tutorial or the MDN JavaScript Guide.
Press Save to save your changes. Alternatively, you can type Ctrl+S (or Cmd+S on MacOS).
We're ready to run our package! Next to the package tabs "Script" and "Settings", you should see four buttons:
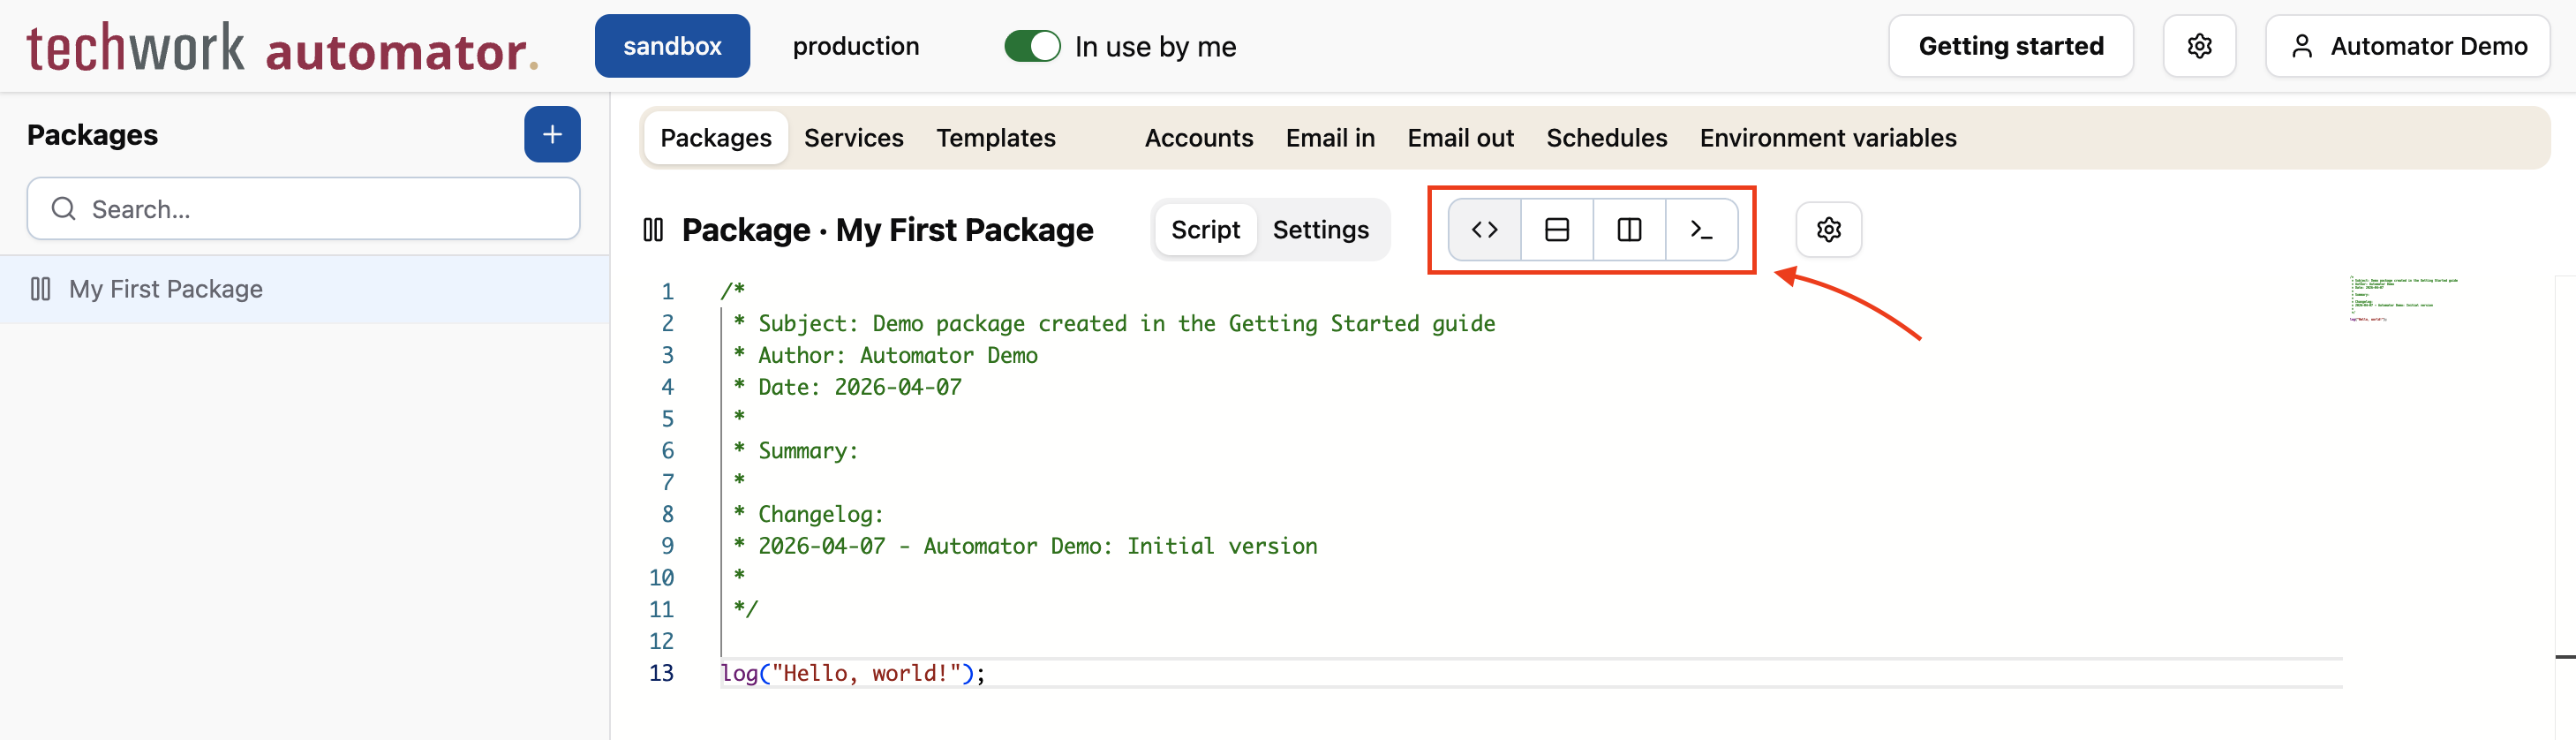
These buttons allow you to toggle between the package editor and the package logs, or view both at the same time.
Press the second button to bring up the package logs in a split view below the package editor.
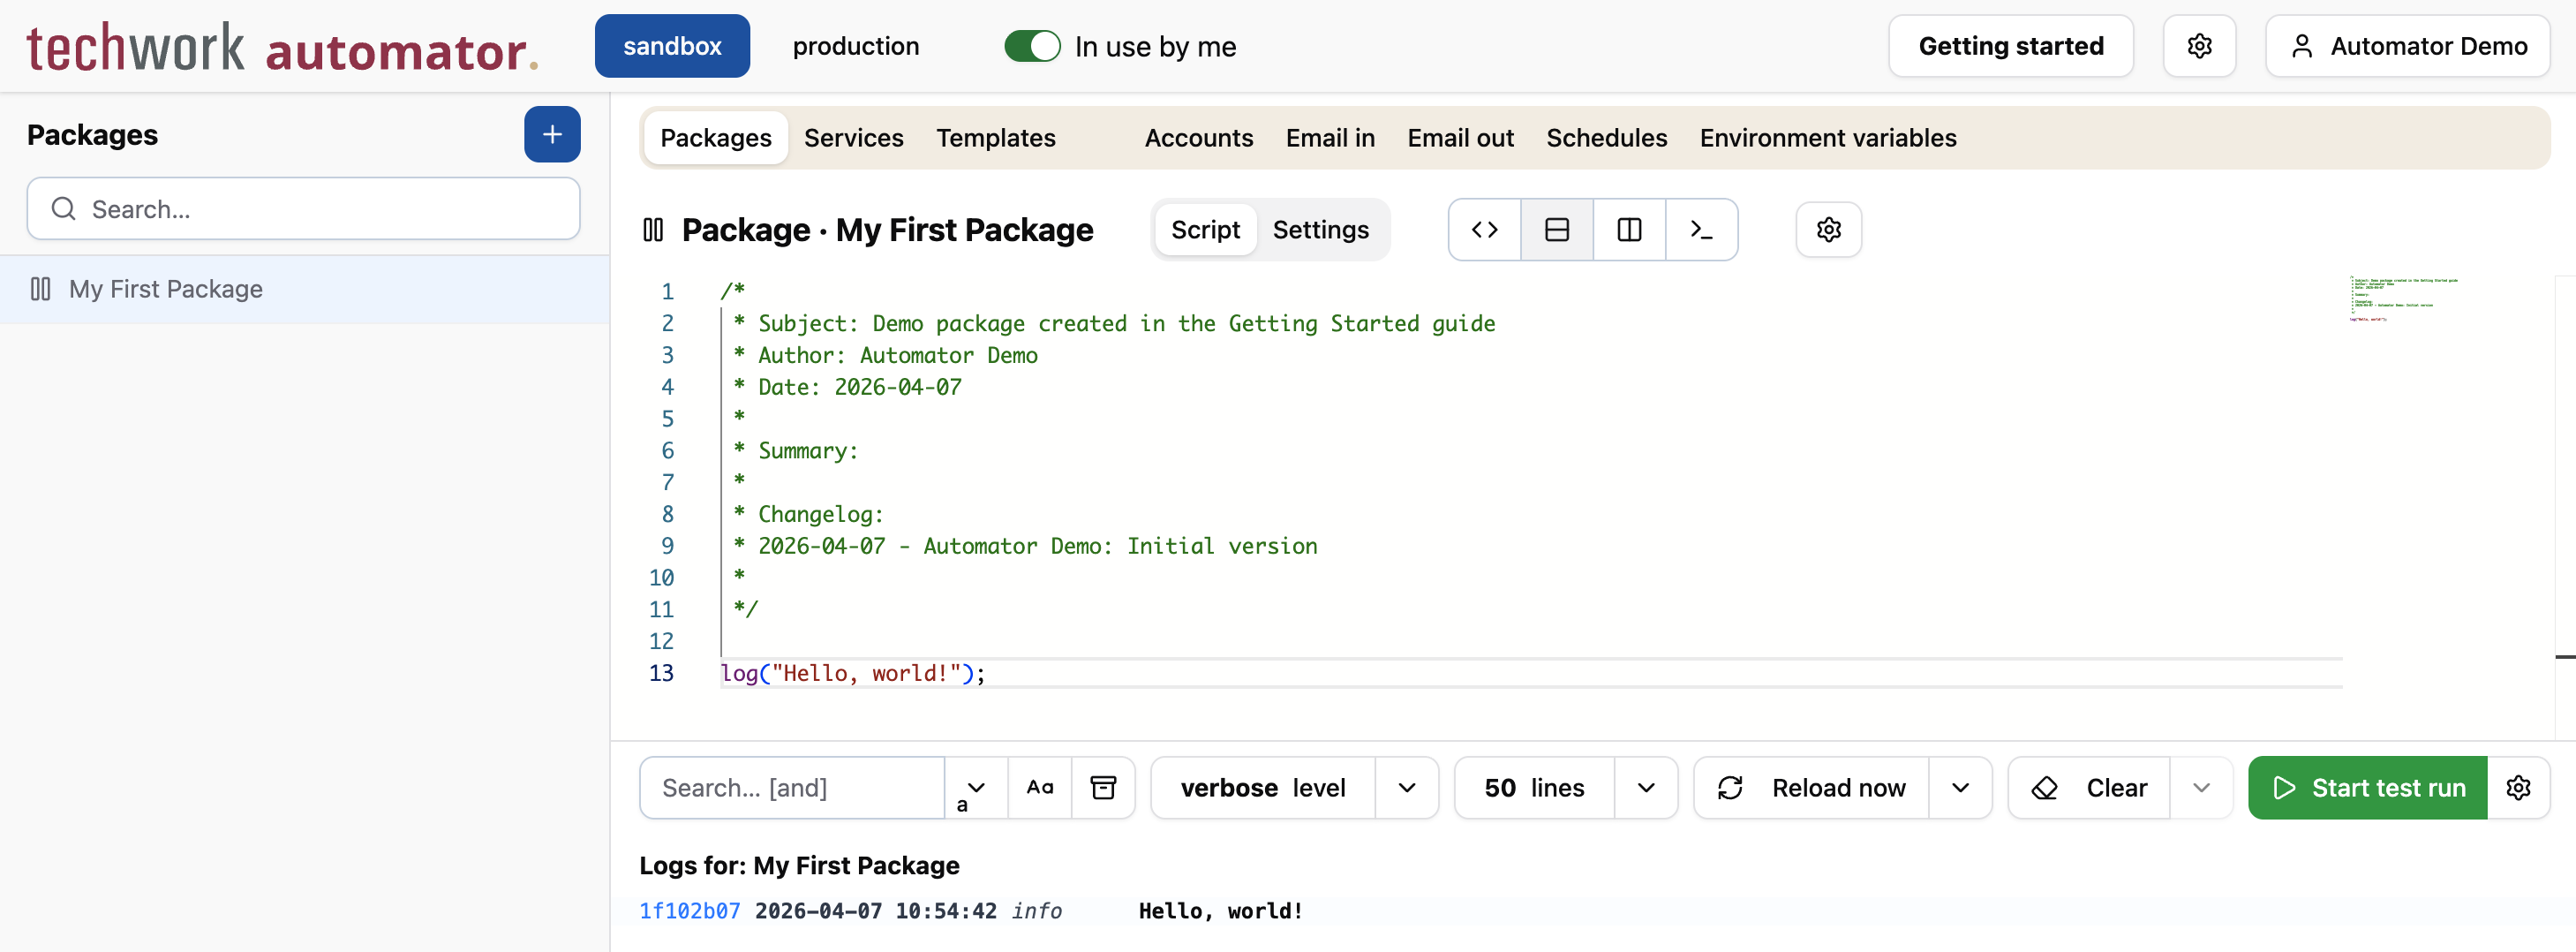
A panel appears with various buttons and search options that allow you to filter the logs. In addition, there is a green button labeled "Start test run". As the label indicates, this will start a test run of the package.
Press Start test run.
If all went well, after a few seconds the log output should automatically appear, including the message Hello, world!.
When you start a test run, the log panel will automatically refresh a few times. In most cases, this is enough to see the log output of the package. However, when a package runs for a long time, or when the automator is very busy and is unable to pick up a scheduled package execution right away, the output might not appear within this auto-refresh period. In that case, try pressing Reload now in the log panel, or use the dropdown menu next to this button to periodically refresh the log output.
Nice! You've just created your first package and executed it.
Right now, the package does not do much yet. In the remainder of this tutorial, we'll expand this package to actually integrate with third-party services, so that it is able to react to external events, retrieve data, and send it to another service.